Yesterday's weather forecast was beautiful and we had sufficient coverage at Day Job for me to take a day off without forcing overtime, so I did. I started a little later than planned - around 9 - but got in a bit over seven hours of solid work before I had to clean up for work at BBHIS.
Since I'd hung the barge rafters a few days prior, I needed to cut and install the lookouts.
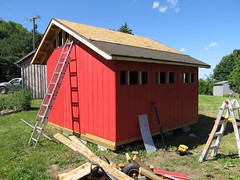
Here's the barge rafters (2x4s). They aren't purely cosmetic, as they add rigidity to the edge of the roof deck and hold up the fascia, but they aren't designed to be load-bearing members.
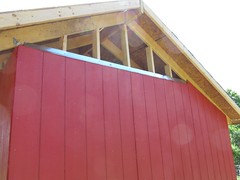
Lookouts are chunks of 2x4, cut to length, spaced 24" on center, and nailed in from both ends. Just a bit of extra rigidity. In this picture you can see the fascia has been installed over the barge rafter as well.
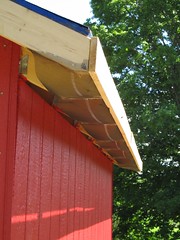
After the barge rafters were installed (and before the fascia went on), I installed my soffit vent. There are LOTS of options for this - perforated vinyl, small circular vents, and so forth - but given that this will be occupied by livestock, more ventilation is more better. A roll of 8" wide screen was stapled to the bottoms of the rafters and the back of the fascia. Soffit boards will be installed starting at the back edge of the screen, providing something like six square feet of free vent space on each side of the building.
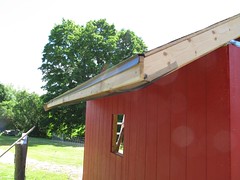
I got a little ahead of myself here - I installed this piece of drip edge early. As such, it was a hair short on both ends because I didn't account for the fascia on the gables. The other three sides were installed properly, though.
Since I was on a roll, I started the dividing wall for the chickens. It went together quickly and relatively pain-free, although installing it meant using my Big Hammer to convince it. The door was cut in without trouble and hinges and a latch were installed. The sloping wall remains to be done but shouldn't be a big deal.
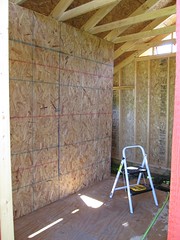
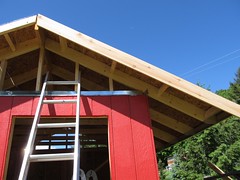
As I started to run out of time, I decided to get the window openings cut in the short wall. These are 1'x3' sheets of Lexan, which will just be set in the wall openings with a simple frame. Light only, no ventilation. The blank wall on the left in this picture will have two 18x24 plexiglass windows cut in as well; no shortage of light here!
I'm hoping to get the roof done tonight after work - since the drip edge is on, all I need to do is staple down roof felt, cut a vent at the ridge, and zip on the shingles. It's a two-square up'n'over job and I should be able to knock it out real quick. I'll be calling the rental place shortly to see if they have a nailer available for today...


3 comments:
BTW, are you planning on adding Gutters and Downspouts to a Rain Barrel? Having Free Water close to a Garden could be very useful, especially if the price of Food keeps going up and up and up....
Eventually there will be at least one rain barrel and possibly two, but it's not an immediate project. We're on a 65' drilled well and also have a never-been-dry creek across the back of our property line. Free for the work of hauling it... ;-)
It's coming together!!! :-)
Post a Comment